How to Build a DIY Pit Barrel Cooker
If you are interested in building a DIY pit barrel cooker, there are several things you need to know. In this article, we’ll cover the benefits, size, and price of this cooking appliance. In addition, we’ll tell you how to obtain a chimney starter to get your cooking fire started.
Building a DIY Pit Barrel Cooker
Building a DIY Pit Barrel Cooker is a great project for barbecue enthusiasts who want a cost-effective way to create a versatile and efficient smoker and grill. The Pit Barrel Cooker is known for its simplicity and ability to produce delicious smoked and grilled meats. Here’s a step-by-step guide to building your own:
Materials and Tools:
- 55-gallon steel drum with a removable lid
- 2x 3/4-inch steel pipe nipples (12 inches long)
- 2x 3/4-inch steel pipe caps
- 3/4-inch steel pipe tee
- 4x 3/4-inch steel pipe floor flanges
- Grill grate
- Grill charcoal grate
- Steel wire
- High-temperature paint
- Metal drill bits
- Measuring tape
- Marker
- Saw (jigsaw or reciprocating)
- Drill
- Wrench
- Sandpaper
Step-by-Step Instructions:
- Prepare the Drum:
- Remove the lid from the steel drum and ensure it’s clean and free from any hazardous materials.
- Mark and Cut Holes:
- Measure and mark a 1-inch hole near the bottom of the drum for air intake. This is where the first steel pipe nipple will go.
- Measure and mark another hole about 5 inches above the first hole for the second steel pipe nipple.
- Using a jigsaw or reciprocating saw, cut out the marked holes carefully.
- Install Air Intake Pipes:
- Thread a 3/4-inch steel pipe nipple into the 3/4-inch tee.
- Attach a 3/4-inch floor flange to the open end of the tee.
- Screw the tee assembly into the lower hole you cut in the drum for air intake.
- Repeat this process for the upper hole, installing the second steel pipe nipple and floor flange.
- Create the Grill Supports:
- Screw the 3/4-inch steel pipe caps onto the tops of the two steel pipe nipples you installed in the previous step. These will serve as grill supports.
- Create the Grill Grate and Charcoal Basket:
- Using the steel wire, create a grill grate that sits on top of the supports you created in the previous step.
- Create a charcoal basket by bending a piece of expanded metal mesh into a cylinder shape and securing it with steel wire.
- Paint the Cooker:
- Clean the drum and all metal parts.
- Apply high-temperature paint to the exterior of the drum and any metal parts to prevent rust and protect the cooker.
- Season the Cooker:
- Before using your Pit Barrel Cooker, it’s a good idea to burn a hot fire inside to season the drum. This will help to eliminate any residual contaminants or odors from the drum.
- Use Your Pit Barrel Cooker:
- To use your DIY Pit Barrel Cooker, add charcoal to the charcoal basket and light it.
- Hang meat using hooks from the grill grate, ensuring that the lid is securely in place.
- Adjust the air intake to control the temperature.
This DIY Pit Barrel Cooker should function similarly to the commercial version. You can experiment with different wood chips for flavor and try a variety of smoking and grilling techniques. Always follow safety precautions when working with metal and fire, and enjoy the delicious results of your DIY smoker and grill.
Benefits of a pit barrel cooker
If you love grilling out, you will surely appreciate the benefits of a DIY pit barrel cooker. Not only is it more convenient, but also enables you to enjoy the benefits of charcoal grilling without any hassle. Moreover, you don’t have to worry about removing the ash, which will save your time and effort. And because the drum is round and narrow, it allows even distribution of air to the fire. A 30-gallon drum is the perfect size to maximize its even-heating potential.
Unlike traditional smokers, a DIY pit barrel cooker is simple to operate. You don’t need experience to use it, and you will get succulent meat every time. Also, the cooker requires minimal maintenance and does not require constant refueling. Beginners will appreciate this type of cooker because it is very easy to use and requires minimal supervision.
Another benefit of a DIY pit barrel cooker is that it is easy to clean. The barrel can be easily brushed with a rag. But even if you do not use a brush, you can clean the barrel with a damp rag. Besides, you can oil it, so that the food will not stick to it.
Another benefit of a DIY pit barrel cooker is that it does not require chimneys. The charcoal smoke will be evenly distributed throughout the drum, creating an even cooking temperature. This ensures that the food is cooked evenly and stays moist. This cooker can also be used for smoking meats, although it’s important to remember that you should use a specific charcoal for this. You’ll also have limited control over the temperature, so it’s important to purchase a wireless thermometer for the best results. A proper temperature for this type of cooker should be about 300 degF or 150degC.
Another benefit of a DIY Pit Barrel Cooker is that it allows you to cook multiple foods at once. Instead of using the same grill, you can use the grate to cook meat and vegetables at the same time. You can also smoke veggies at the same time. A Pit Barrel Cooker is easy to use and provides consistently good cooking results.
Cost of a pit barrel cooker
The cost of a DIY Pit Barrel Cooker varies depending on which model you choose. The top-rated models feature a large drum and are made from premium steel with an industrial-grade matte paint finish. For those on a budget, the cheapest option is the Pit Barrel Junior, which offers the same high performance levels as the Classic model.
A DIY Pit Barrel Cooker can be made for as little as $100. You can find more information about the product on the Pit Barrel Cooker Co. website. You can also purchase an online kit that includes everything you need to build a cooker. The main advantage of a Pit Barrel is that it puts the food right in the center of the action. Its unique Hook-and-Hang method produces consistently great-tasting food.
Pit Barrel Cookers require less maintenance than a conventional smoker. The food cooked in a PBC has an out-of-this-world taste and requires only a few minutes of cleaning. To prevent rusting, you can oil the surface after cooking, brushing it regularly with a damp rag.
Once you purchase a Pit Barrel Cooker, you should choose charcoal that is compatible with it. Using other fuels will reduce the control over temperature. For this reason, you should consider purchasing a wireless thermometer to monitor the temperature of your food. Ideally, you should cook your food at temperatures of 300 degF (150degC).
A DIY Pit Barrel Cooker is a great beginner smoker if you don’t have any previous smoking experience. You can set the temperature of your food easily with these cookers and produce consistently great results. They are also portable and easy to clean.
Size of a pit barrel cooker
While the Pit Barrel Cooker is not the most stylish outdoor cooker, it is one of the most versatile options you can buy. Unlike an electric smoker, this device is portable and easy to use. One of the biggest benefits of this type of barbecue cooker is that you can cook meat for long periods of time, and you can control the temperature of the cooking process. A Pit Barrel Cooker can also produce delicious smoked meat.
If you’re new to cooking and smoking, a Pit Barrel Cooker may be the perfect option. It’s easy to use, requires no experience, and offers delicious results. A Pit Barrel Cooker includes a wooden hook remover to make the removal of the hook easier. The Pit Barrel Cooker itself is easy to assemble, and the size is not an issue.
There are several differences between Pit Barrel Cooker models. The PBX is the largest, with a width of 22.5 inches. The Pit Barrel Cooker PBX is shaped like a convection oven, and has 16 stainless steel hooks suspended from three steel bars. This design provides even heating and airflow. The PBX can hold up to eight slabs of ribs.
The Pit Barrel Junior is a smaller version of the Pit Barrel Cooker. It has the same features as the Pit Barrel Classic but is more portable. The diameter is smaller, so it’s perfect for a small barbeque or cooking for a small family. It’s also great for cooking chicken and sausage.
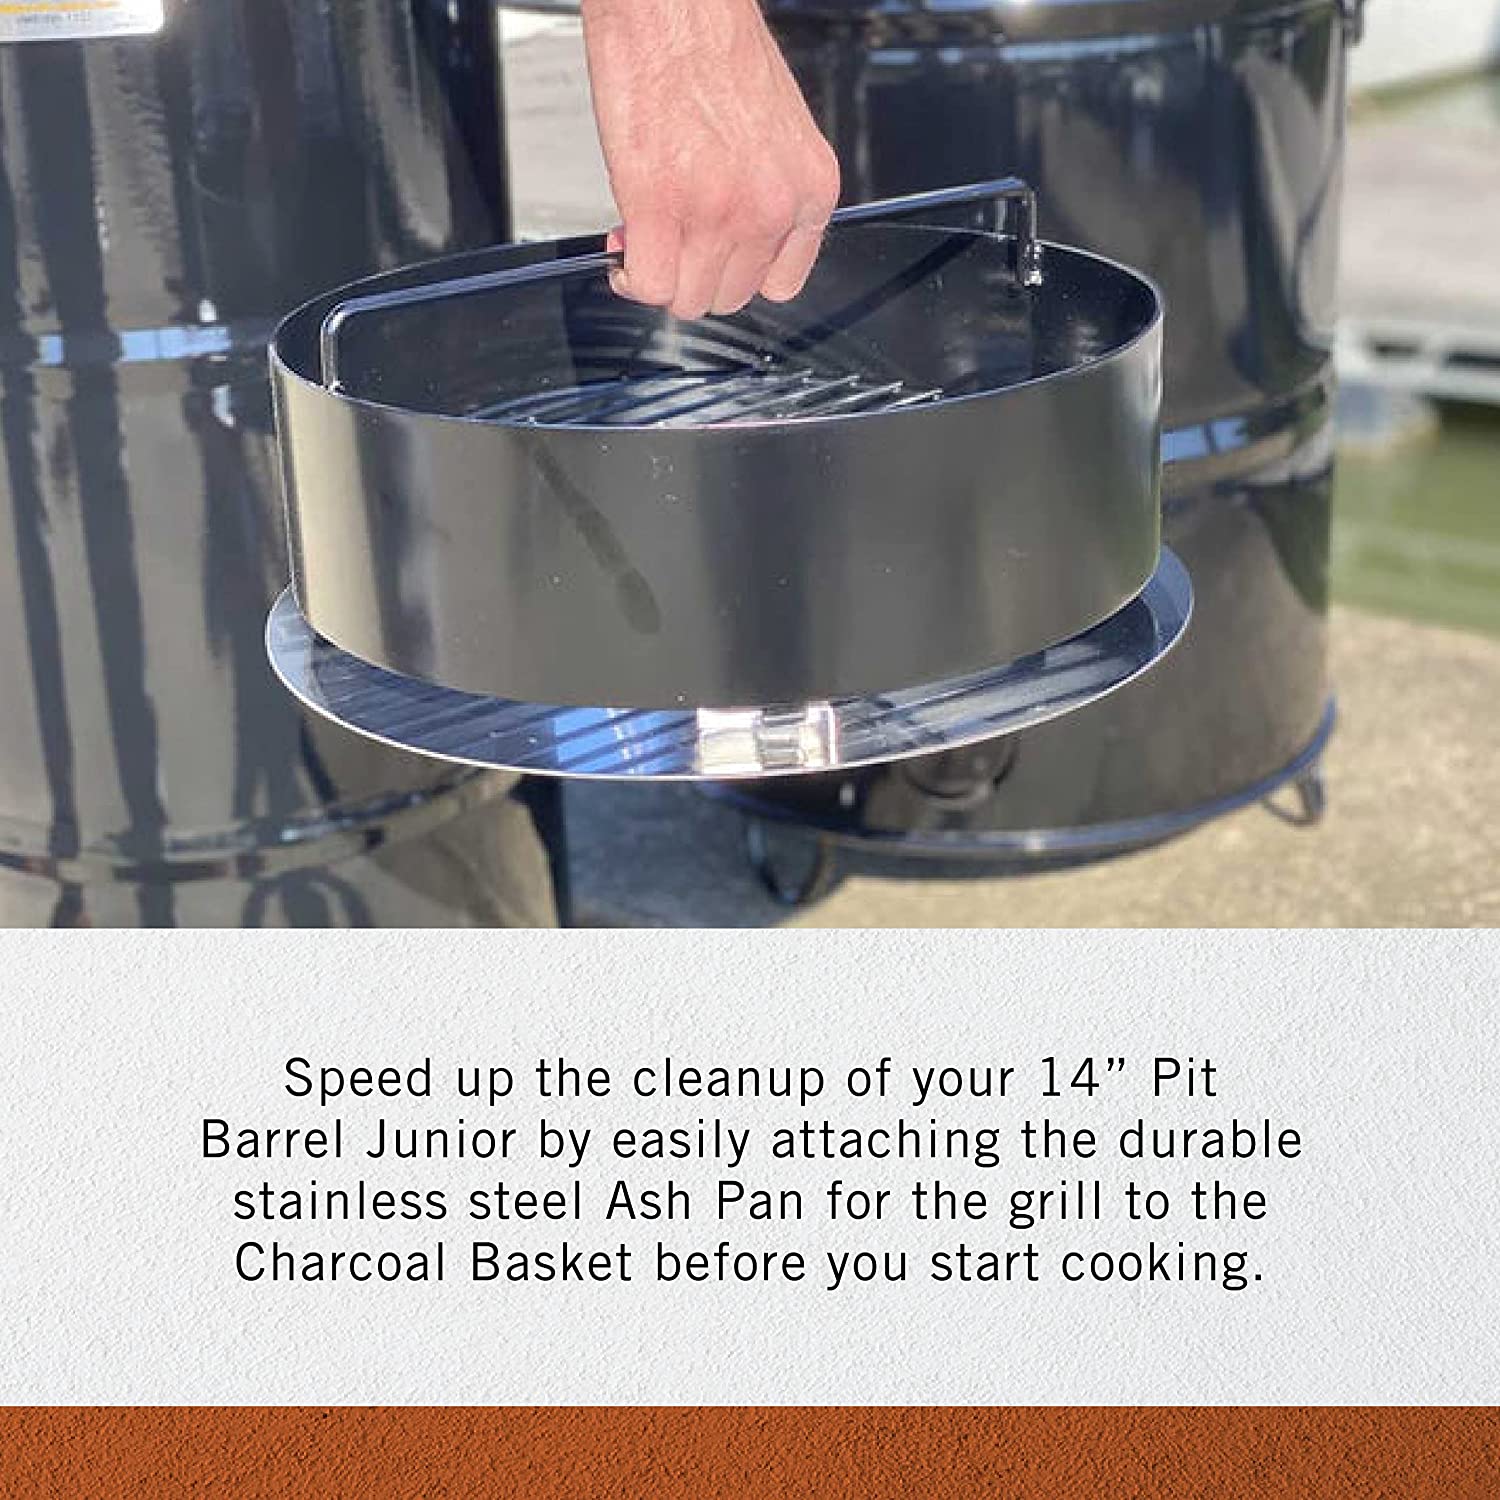
The Pit Barrel Cooker is easy to use and clean. It includes a convenient ash pan for removing ashes. These barbecue cookers come fully assembled with the barrel, rods, and coals. You’ll need to add coals and grill grate.
Getting a chimney starter for a pit barrel cooker
To start the fire inside your diy pit barrel cooker, you can get a chimney starter. Most chimney starters are made of paper, which is thin and light. It is important that you place the chimney starter on the grill, not concrete. Otherwise, it will burn grass and wood decks. A chimney starter stays hot for a while, so you should always handle it with long tongs.
When getting a chimney starter for your DIY pit barrel cooker, it is important to choose the right size. Make sure to select a chimney starter designed for the type of charcoal you plan to use. The chimney starter should be large enough to hold the amount of charcoal you want to use.
A chimney starter is a convenient tool that will make the cooking experience easier and more enjoyable. Using a chimney starter will help you pre-heat the coals much faster. The chimney starter should be able to heat a quarter of the coals in under 10 minutes. It will also increase the lifespan of your PBC.
A chimney starter is made of metal cylinders that are open at the ends, and have a metal grate to hold the charcoal. It also has a place for newspaper or other lighting materials. The chimney starter should be heavy enough to prevent falling into the fire.
Another way to use a Pit Barrel Cooker is to smoke meat. The charcoal smoke creates an even heat throughout the drum. This is a great way to cook burgers or other meats, and it will also add that smoking flavor to your food. It will also be much easier to keep the meat moist and flavorful. Another great feature of the Pit Barrel Cooker is the lid, which prevents the moisture from escaping while cooking.
Seasoning a pit barrel cooker
The first step in seasoning your Pit Barrel Cooker is lighting it. The cooker can get extremely hot when it first starts cooking. It will then settle to a safe 245 degrees Fahrenheit. This spike is short-lived and not harmful to the food. Many traditional cooking methods call for a hot start. This spike will be less of an issue if the cooker is placed on bricks or paver stones.
The next step is to add firewood. If you do not have a chimney starter, you can purchase a charcoal basket that is made for a Pit Barrel Cooker. This will ensure even heat distribution, and also ensure that the charcoal has plenty of room to burn. Also, since you will be cooking vertically, you will not have to worry about hot conduction points and water pan. A Pit Barrel Cooker is also equipped with a removable grill grate. You’ll also need a wire charcoal basket that sits just above the bottom edge of the barrel. This wire charcoal basket will help maintain the temperature of the charcoal in the barrel, which will help you cook meat consistently.
When choosing a smoker, look for a barrel that has a 30 gallon capacity. These barrels have an excellent airflow and heat distribution. They are also highly portable, making them ideal for spontaneous barbecues. They are also made from high-quality materials and are easy to transport.
Once the charcoal basket is ready, you can place the charcoal basket inside the cooker. Spread it evenly over the coals. Next, place the grate inside the cooker. If you do not use the lid, you can leave it open and let the meat hang. Leave it to heat up for about 20 minutes.
Read more great BBQ articles at Bob’s BBQ Tips

Did you miss our previous article…
https://notoriousbob.net/?p=1936