How to Build a Smoker
If you are planning to build a smoker, you will need some materials and a welder or weldor. You will also need barbecue racks. Once you have these items, you can start building the smoker. The next step is to control the temperature. The temperature should be between 150 and 275 degrees Fahrenheit.
Building a temporary or non-permanent smoker
When you’re planning on building your own smoker, it’s important to decide on the materials you’ll use. They should be durable and resistant to high temperatures. They also need to produce minimal fumes. Some common materials for smokers include stone, brick, and metal. You can experiment with different designs and materials to decide which one suits your needs the best.
A smoker can either be fixed to the ground or it can be portable and set up anywhere. You can even use cinder blocks or tin roofing to make one. Whether you’re planning a luau, or pig-pickin’, a smoker can help you create a great barbecue experience.
If you’re looking for an inexpensive, portable smoker, a cardboard box smoker may be a good option. One Instructables article provides a plan on how to make a smoker from a cardboard box. This is an inexpensive, but effective option. It will let you create a smoker that will fit your needs and your budget.
Getting a welder/weldor
If you’re looking for someone to build your smoker for you, getting a welder/weldor can be a great option. Welders specialize in joining metals, plastics, and other materials together. They are skilled craftsmen who should have good dexterity, a keen attention to detail, and knowledge of the different materials. They also need to be familiar with the best practices of welding and how to perform the process.
When choosing a welder, consider the size of the smoker you want to build, the type of steel you’ll be welding, and the types of welds you’ll be using after the smoker is finished. A small smoker can be made with a welder that’s only capable of welding 1/4-inch steel, but a large smoker will require a much bigger machine.
If you don’t own a welder, advertise the job for someone to do it for you in the classifieds, or put a sign in your yard. While welding can be an intimidating hobby, it’s not impossible if you’re determined to learn how to do it. You’ll soon find out that welds are easy to make once you learn how.
The smoke from welding fumes can be hazardous to the lungs. The vapors produced by welding are made up of tiny particles that are as small as 0.2 microns. Because of their size, they’re very visible. Welders should wear a protective mask when welding. A good helmet will also help protect them from the fumes.
When getting a welder/weldor, remember to account for their expenses. Make sure you pay for the entire length of the welding tube, so that you don’t end up with scrap pieces. You’ll also want to know how much the welder/weldor will be charging for the work.
If you’re not sure how to use your welder/weldor, read the Baker’s guide first. It explains the basics of welding, and explains the tools used in the process.
Getting barbecue racks
One of the best ways to make the most of your smoker is to invest in barbecue racks. These can give you more space inside the grill and can help you prepare specialized foods. For example, grill racks can help you cook jalapeno poppers, oysters, s’mores, and other foods.
The best barbecue racks are made of metal and slide out of the way for easy access. They are also dishwasher-safe, which makes cleanup a breeze. Another benefit is that these racks come with wingnuts, which mean you won’t need to worry about using tools when assembling them.
Controlling the temperature
Controlling the temperature of a smoker is an important step in the process of smoking meat. Smokers have a tendency to quickly reach the temperature they need, but it can be difficult to get back down once they’ve reached the desired level. One way to prevent this problem is by using a smoker temperature controller, which uses a variable-speed blower to supply the smoker with the correct amount of air to keep the temperature stable.
Smokers are designed with two air vents called intake and exhaust dampers. During the smoking process, both the intake and exhaust dampers must be partially open. When they are closed, they starve the fire by preventing fresh oxygen from reaching the coals. By keeping the intake and exhaust dampers partially open, smokers are able to maintain the proper temperature.
When using a smoker, the temperature should be between 200 and 250 degrees Fahrenheit. If the temperature is too high or too low, the meat will be overcooked or dry. Smokers can be used with charcoal or wood chips. Charcoal burns at high temperatures, reaching over 2,000 degrees Fahrenheit. Most types of wood burn at around one hundred and ten degrees lower than charcoal.
Controlling the temperature of a smoker can be a tricky process. It’s not always possible to achieve a uniform temperature in a smoker, so experimentation is the key. One way to get close to the perfect temperature is to use one chimney of charcoal. Then, set the timer to 30 minutes or so and observe the level in the smoker. If you have a hard time getting the desired temperature, the smoke is not yet ready.
You can control the temperature of a smoker by using its intake and exhaust dampers. This system regulates the temperatures and releases excess heat and oxygen. In fact, charcoal fires create gases that smother the fire if the vent is not set correctly. It’s crucial to know how to set these vents based on the smoke flavor you want to achieve.
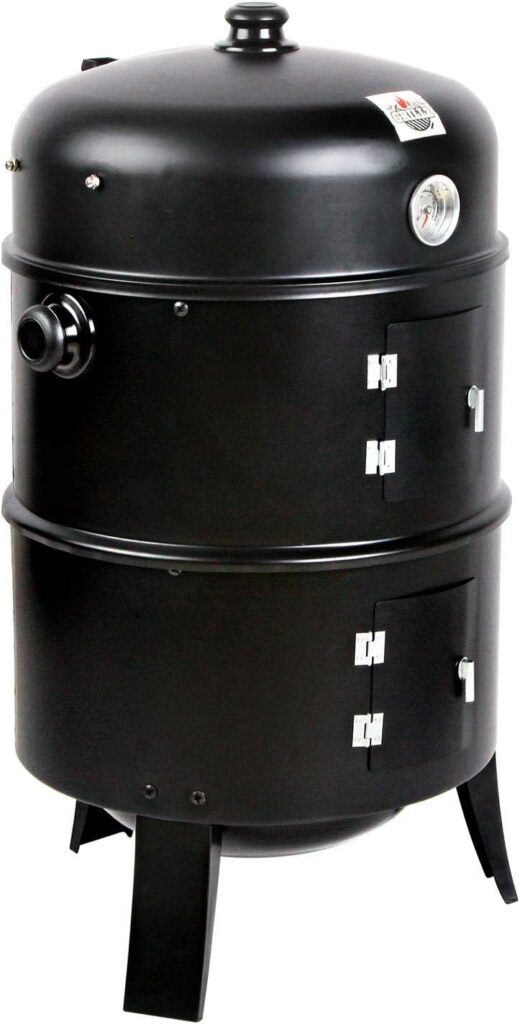
How to Build a Smoker Step By Step
Building a smoker can be a rewarding DIY project for cooking delicious smoked meats and other foods. There are various types of smokers, such as offset smokers, drum smokers, and box smokers, but I’ll provide a basic guide for building a simple drum smoker, also known as a Ugly Drum Smoker (UDS). Here’s how you can build one:
Materials and Tools:
- 55-gallon steel drum (food-grade, unlined)
- Lid with bung hole (also from the drum)
- Charcoal basket (expanded metal or a basket from a Weber kettle grill)
- Charcoal grate (from a Weber kettle grill)
- Grill grates (two or three, depending on your preference)
- Steel pipe nipples and caps (for air intakes)
- Steel angle iron (for a stable base)
- Heat-resistant paint
- Drill with bits
- Jigsaw
- Welding equipment (optional)
Instructions:
- Select and Prepare the Drum:
- Ensure the drum is food-grade, unlined, and free of any hazardous materials. Remove any residual chemicals or residues by burning a hot fire inside or using a food-safe drum cleaning solution. Rinse thoroughly.
- Cut the Lid and Intake Holes:
- Using a jigsaw, cut the top off the drum, leaving a lip around the edge to create a lid. This is where the grates will sit. Be careful not to leave sharp edges.
- Cut three evenly spaced 1-inch holes near the bottom of the drum for air intakes. These holes will allow you to control the airflow and, consequently, the temperature inside the smoker.
- Construct the Charcoal Basket:
- Create a charcoal basket by bending a sheet of expanded metal or using a ready-made basket. Ensure it fits the drum and has handles for easy removal.
- Install the Charcoal Grate:
- Place the charcoal grate (from a Weber kettle grill or a similar grate) inside the drum about 8-10 inches above the bottom. This is where you’ll place your charcoal for smoking.
- Attach the Grill Grates:
- Insert the grill grates into the lip you created on the drum. You can use multiple grates for different cooking levels. Make sure they are level.
- Assemble the Air Intakes:
- Weld steel pipe nipples and caps to the three intake holes you cut. These will serve as vents that you can open or close to control the airflow and temperature inside the smoker.
- Build a Base:
- Construct a stable base for your drum smoker using steel angle iron. This will keep the smoker off the ground and make it easier to use.
- Paint the Drum:
- Apply a heat-resistant paint to the outside of the drum to protect it from the elements and provide a clean finish.
- Season the Drum:
- Before your first use, season the smoker by building a small charcoal fire and letting it burn for a few hours to burn off any residual contaminants and create a layer of smoke residue inside the drum.
- Start Smoking:
- Once your drum smoker is ready, you can start smoking your favorite meats and other foods. Use a reliable thermometer to monitor the temperature inside the drum.
Remember that building a smoker requires some basic DIY skills, and if you’re not confident in your abilities, you can consider purchasing a ready-made smoker or seeking assistance from a professional welder. Safety precautions should always be taken when working with metal and heat sources.

Did you miss our previous article…
https://notoriousbob.net/?p=1883